
Bodyweight Exercises The weight of your body serves as resistance throughout these activities. They often work a variety of muscles and promote strength and stability. You can perform them almost...
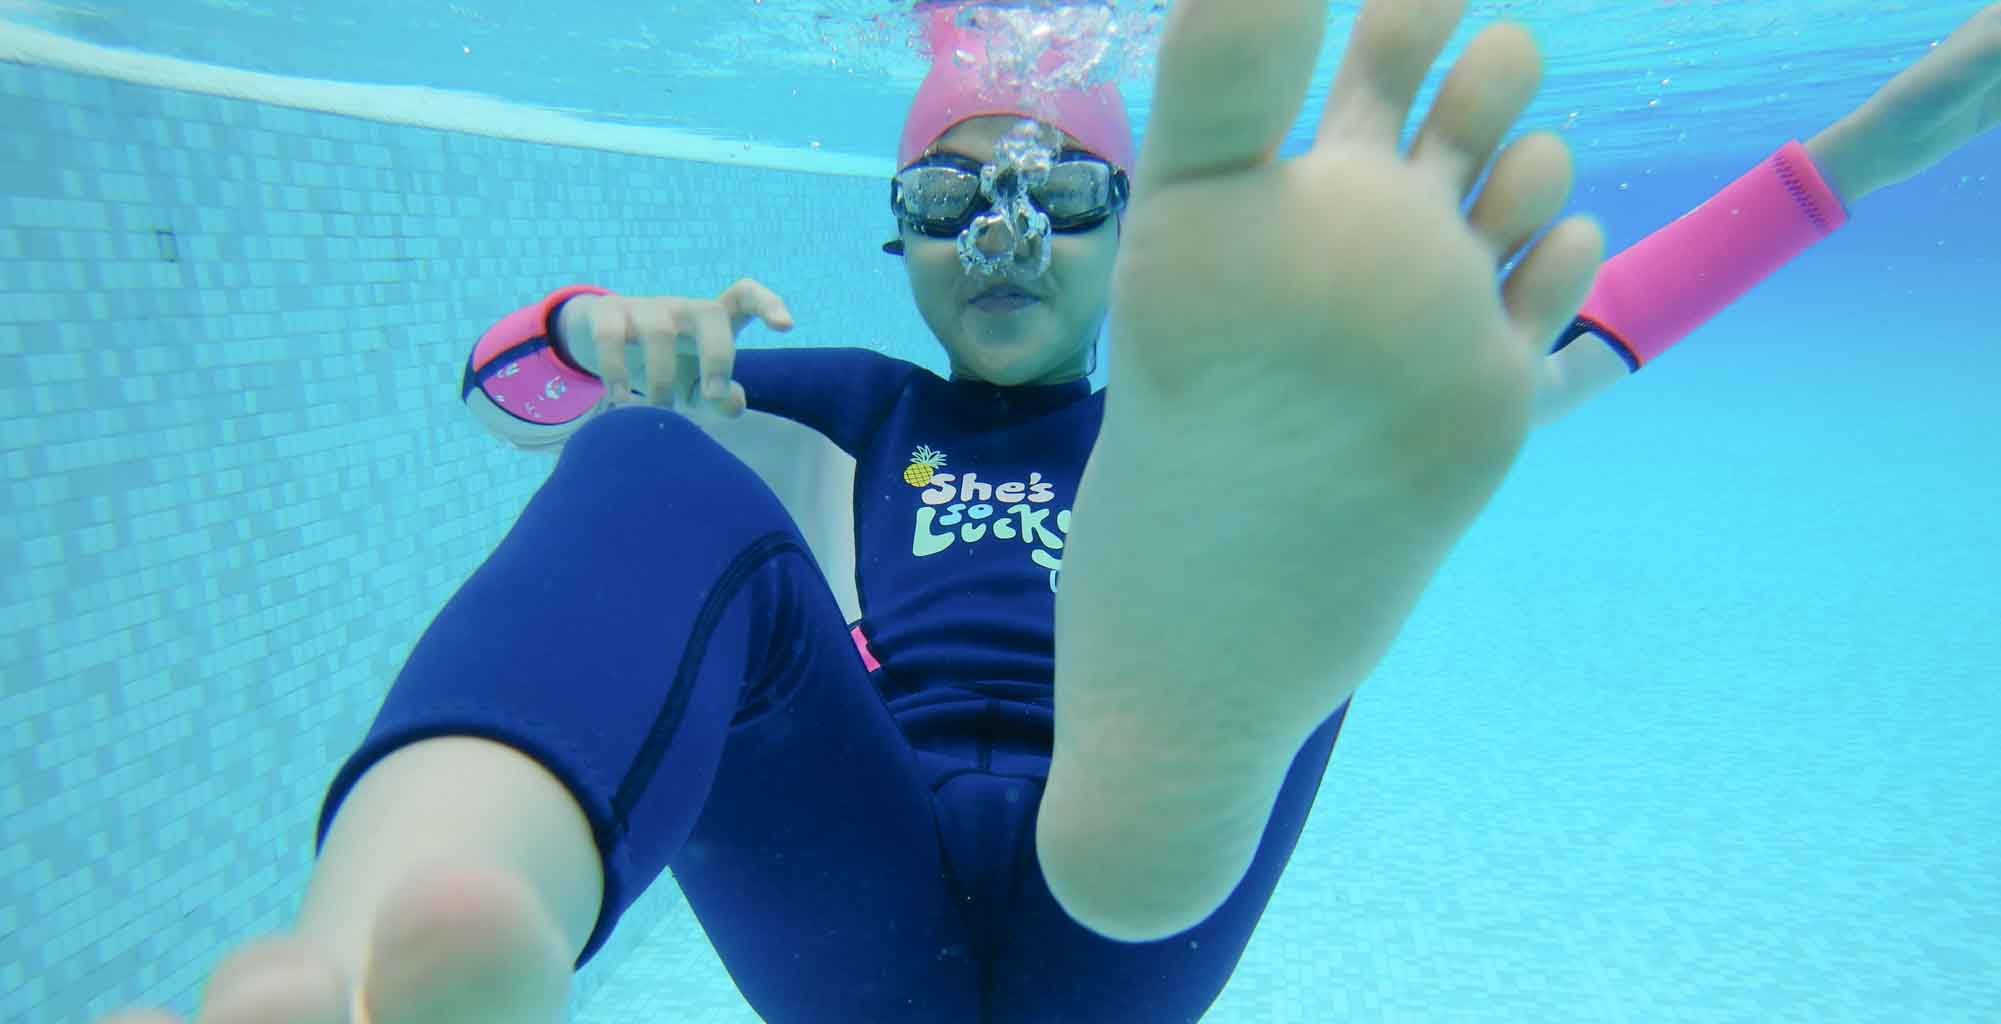
Top 10 Drills For Freestyle Swimming
Improve your freestyle with ten drills from the world’s greatest coaches and swimmers.
Everyone wants to swim faster and improve their freestyle stroke, yet we get overly focused on specific technical and mechanical flaws. Our catch isn’t strong enough, we’re not rotating properly, or our feelings for the water aren’t quite there.
That’s where freestyle drills come in, forcing you to concentrate on a specific area of your stroke and then transfer it to your regular swimming stroke.
The freestyle swimming drills listed here will help you swim faster and better.
Drills should be done to apply them to your swimming, not merely for the sake of performing them.
Choose a few drills to integrate into your next swim workout and mix them with your swimming to reap the benefits of creating a more deliberate and quicker freestyle.
Here are ten freestyle drills in no particular order:
The Pendulum Effect
The freestyle swim stroke is a complicated way to move in a sport. From the finger’s tip to the foot’s bottom, many muscles are always moving, causing and resisting forces. While one side of the body is doing something active, the other side must relax and stabilize parts of the body so that the busy side can do its thing[3].
When doing this stroke, the body is on its back, and the face is turned toward the water.[2] There are six parts to the freestyle stroke:
- Hand entry
- Reach forward
- Middle pull through
- Pull through Hand exit
- Most of the way back
The Objective Of This Drill
- Knowing the connection between recuperating and stroking arms
- Acceleration during the switch
- Keeping equilibrium
How To Perform This Drill
Step 1: Float in the water on your side with one arm near the surface and the other extended in front. Kick productively. Move your side hand up to your waist, lifting your elbow to a point, like in the Shark Fin drill. Maintain core stability as you roll towards your back, breathe, and then back to your initial side posture.
Step 2: Maintain this stance for five seconds while kicking. Note that neither arm provides any forward motion in this posture, on your side, with one arm extended and the other at its greatest point in recovery.
Step 3: Finish your recovery with your arm over the water by striking through with your extended arm. Locate the exact floating point on the opposite side. Your lower arm should be extended, while your upper arm should form a shark fin. Hold for another five seconds while kicking.
Step 4: Repeat the process on the other side. Proceed to the pool’s far end, holding the same position with your arms on either side for five seconds before switching. Observe how your hips flip sides as you adjust arm positions. It’s also worth noting that each transfer accelerates from start to finish.
Step 5: Repeat the length, but hold for only three seconds before switching sides. Experience the start and end of each switch. The motion begins slowly and quickly accelerates from side to side, similar to the extremes of a pendulum’s swing.
Step 6: Repeat the duration, but only hold for one second before switching sides. With each switch, feel the pendulum swing and gain speed. You’ll see that even though one arm is reaching and the other pulls you out of the water, you’re still moving ahead.
Step 7: Keep practicing, noticing the pendulum effect with each stroke. Concentrate on leveraging your hips to provide power to your arm position changes. Feel your stroke cover more ground with less effort.
Chart Of Drill Feedback
Problem: The issue is that I can’t keep my elbow in a shark fin.
Modification: Ensure your opposing shoulder is at its lowest position in the water, allowing you to aim your recovering elbow toward the sky. Relax your hand and suspend it from your upper elbow.
Problem: The issue is that my hips do not add power.
Modification: Your hips are most likely floating flat. Begin in a side floating position, with your shoulder and hip on the recovered side elevated. Make sure to reach the side floating position with your shoulders and hips each time you switch.
Problem: When I turn sides, my kick comes to a halt.
Modification: Keeping a continuous kick is key in this practice and the entire stroke. Blank spaces might disrupt the pendulum effect. Instead, use your kick to activate the switch.
Hip Skating
What Is This Drill For?
- Taking a look at what the hips do
- How to use the leverage from the beginning
- Learning how to go from hip to hip
How To Do This Drill
Step 1: The beat of ice skating is like the beat of freestyle swimming. One side of the body balances while the other side pushes. The ice skate does not move in shorter, more choppy steps to go faster. Instead, each step is longer, and the hips are used as levers to move the body. Try it. Attach an imaginary ice skate to the bone at the highest and most forward point of your pelvis on each of your hips.
Step 2: Now, push off the wall and float “downhill” with your face down in the water. This will get you ready to swim freestyle. Move forward on the hip skate in your mind. When you’re ready to take your first stroke with your right arm, shift your weight to your right hip, so you’re only balancing on that skate. Then start the stroke. As your right arm nears the end of its stroke, shift your weight to your left hip skate. This lets your proper right hip rise while your left arm starts its stroke and your right arm recovers.
Step 3: Keep moving your hips to the right, then to the left, then to the right, then to the left. Notice how moving your weight from one skate to the next sends power up through your core to your arm stroke.
Chart For Drill Feedback
Problem: I can’t float “downhill” and stand on my hips simultaneously.
Modification: The “downhill” position fixes your position when you’re swimming. Start from there. Your stroke is driven by how you stand on your hips. Focus on core stability in both directions. You need to be patient and keep practicing to get good at both.
Problem: Even when I’m not breathing, my head moves side to side with my hips.
Modification: Loosen up the muscles in your neck. When you are not breathing during the stroke, let your hips and shoulders roll while keeping your head still. Look at the bottom of the pool again and again. It’s like your head is a separate thing that floats in front of your body.
Problem: I stop gliding if I do it for too long.
Modification: Find the point before you slow down and switch your weight to the other hip to start your next stroke. This will help you keep moving forward.
Heads Up Freestyle
THE PURPOSE OF THIS DRILL
- Learning to grab the water and stroke back with a continuous stroke
- Trying to match the kick with the arm stroke
HOW TO PRACTICE
Step 1: A lifeguard swimming to help a person in trouble uses a modified head-up freestyle to monitor the person and get to them as quickly as possible. In the same way, a sprinter on a water polo team races to get the ball, using a modified version of head-up freestyle to keep an eye on the ball and ensure it gets caught. Check out Heads Up Freestyle. Look at the point at the pool’s far end and swim as fast as you can to get there.
Step 2: Swim quickly, keeping your eyes ahead and your chin low in the water. Stay calm and keep your head up. Notice that you should keep your head up and that as soon as your hand enters the water in front of you, you should use your fingertips, palm, and forearm to move through the water. You should also stroke continuously. Your stroke shortens, and your recovery area grows. Also, remember that you can keep your head up if you press down on the water with your hands, but that will slow you down.
Step 3: Keep swimming with your head up and your hands in the water immediately with each stroke. Make sure your elbows are up. With each short, quick stroke, move toward the back. Notice that when you move forward by pushing back on the water, your head stays above the water without you pushing down. With each stroke, get a strong grip on the water and move closer to your goal.
Step 4: Your body is not in the best position in the water when your head is up. To swim in this “uphill” position, you must keep your core stable and kick actively, coordinating your kick with your arm stroke. Even though the kick is faster than the arm stroke, there should be one kick for each arm entry. As one arm comes forward, bring one foot down. Notice that when you match the rhythm of your kick to the arm entry, your kick also matches the end of the stroke by the other arm. This gives the whole stroke more forward motion and life and balance.
Step 5: Keep going toward your goal. Even though this is a bad way to swim, you can still move forward well if your stroke’s parts are in sync and working together. Rest, then give it another shot.
Step 6: Now put your face in the water and swim freestyle like always. Use the same quick stroke rate you used in the Heads Up drill. Keep your elbows up and press back on the water. Time the downbeat of your kick to when your head first touches the water before you. Feel your stroke getting stronger and more balanced.
Step 7: Take a break, then switch between Heads Up Freestyle and regular Freestyle for a few lengths.
CHART FOR DRILL FEEDBACK
Problem: I am having trouble keeping my face up.
Modification: Swim quickly and keep your elbows high at the beginning of each stroke. Get to the back of the stroke quickly. Don’t try to stay up by pushing down on the water. Instead, go forward by pushing against the water. When each arm comes in, kick.
Problem: It’s a lot of work.
Modification: Swimming “uphill” is just as hard on your body as running “uphill.” And for the body to move forward, all of its parts must work together.
Problem: My neck hurts because of it.
Modification: Make sure you’re keeping your balance on your chest. Doing this means you won’t have to lift your chin as much to keep your face out of the water. If it still hurts after making this change, stop doing it.
Horizontal Rope Climbing
THE PURPOSE OF THE DRILL
- Using the largest muscle that can be used
- Going past your hand that is anchored
- Feeling efficient forward motion
HOW TO DO THIS DRILL
Step 1: Think about how a person climbs a rope. Hand over hand, the climber uses one hand to grasp the rope at a point higher than the body while the other holds the body steady at the previous advance. When the hand reaching gets a good hold on the rope, the climber moves their body past the hand reaching, and the lower hand becomes the hand reaching a higher point. This is how swimming should be done. Instead of churning the water like crazy, good swimmers reach out and grab the water in front of them. They then move their bodies hand over hand past that point.
Step 2: String a rope from one end of the pool to the other. Use the lane line hooks at each end of the pool to secure your rope, but leave enough slack so that most of the rope floats about a foot below the surface. For this drill, don’t use lane lines. They can break without warning and cost a lot to fix.
Step 3: Once your rope is in place, take a deep breath and float face down over the rope. Think of a person climbing a rope. Reach as far forward as possible and grab the rope with one hand. Keeping your elbow high, pull your body past the reaching hand until your arm is straight and at your hip. Use the other hand to reach a farther point at the same time. Keep moving your body along the rope by crossing your arms over each other. When breathing, gently lift your face from the water and put it back down.
Step 4: Keep going until you reach the end of the pool. Feel your body move through the water, passing your hand as it reaches out. Do it more than once. Then try freestyle swimming without a rope. Grab the water, and then move past that point with each stroke. Make your way through the water. This is an essential part of swimming well.
Problem: This is hard!
Modification: Don’t let your elbows drop. When your elbows are high, you have more power to lift your body past your hand.
Problem: My legs keep moving back and forth.
Modification: Use a stable core to change something. You can also give a soft kick.
Problem: I thought I was supposed to line up my reach with my shoulders, not the middle of my body, like with the rope.
Modification: That’s great! This is true, and it’s one of the things this drill does not do well. Try to ignore this and focus on getting past the hand reaching out to you.
Waterline Drill
THE PURPOSE OF THIS DRILL
- Determining the proper head alignment
- Sensing the waterline on your face
- Neck, shoulder, and upper back relaxation
HOW TO DO THIS DRILL
Step 1: Face up in the water, arms at sides, spine straight. Produce no forward movement.
Step 2: Bring your chin to your chest until the water’s surface, or “waterline,” is below your ear lobes. The muscles in your neck and shoulders are fully engaged in this position. Your legs may also sink, making it harder to maintain your flotation.
Step 3: Lie horizontally in the water with your face and spine straight. Raise your chin and rock your head back until your ears are buried and the water is visible at the back of your head. Your waterline will be between your brows and around your throat. Observe that the muscles in the back of your neck and upper back are engaged in this position. Your float will most likely not suffer, but you will most likely feel stiff.
Step 4: Lie horizontally in the water again, face up, spine straight. Maintain a neutral chin, as if you were looking at someone the same height as you. The waterline will surround your face from your hairline to the bottom of your chin. Your ears will be immersed, and your neck, shoulder, and upper back will be relaxed as if your head were resting on a pillow. This is the proper backstroke head position.
CHART OF DRILL FEEDBACK
Problem: The issue is that water goes into my ears.
Modification: This problem will be remedied in the following section when you add forward motion to the float. Instead of entering your ears, the water will flow through them.
Problem: The issue is that I appear to float better with my ears out of the water.
Modification: Instead of turning your pelvis forward, you may get the required abdominal contraction by elevating your upper body. Tightening your abdominal muscles using your pelvis is critical because your upper body must remain aligned in your traveling direction.
Problem: I’m having difficulty relaxing my neck.
Modification: Lower your shoulders as a modification. Float with your palms facing the water’s surface. Deeply inhale and exhale. Allow the water to hold your head.
Vertical Kicking Sequence
THE PURPOSE OF THIS DRILL
- Understanding the importance of foot speed
- Engaging the correct muscles for flutter kick
- Feeling the water with your feet
HOW TO DO THIS DRILL
Step 1: Immerse yourself in water at least as deep as you are tall. Put yourself in a vertical position. Activate your core. To keep your head above water, begin a gentle sculling motion (tracing side to side underwater figure eights with your hands).
Step 2: Begin kicking the flutter kick without producing forward or backstroke motion, moving your extended legs in a sweeping motion alternately so that when one foot is forward, the other is back, within a range of approximately twelve to fifteen inches. Your toes should point to the pool’s bottom, and your feet and knees should be rotated slightly inward.
Step 3: Concentrate on the muscles you’re working. They should be the large muscles in the back of your legs. You should feel your quadriceps as you move your leg forward. You should feel your hamstrings and glutes working as you move your leg back.
Step 4: As you kick, your legs should be fairly straight but not locked at the knee. As you accelerate your forward and backward kicks, avoid raising your knees as if marching or bicycling. It should feel like your legs are sweeping back and forth through the water like a broom.
Step 5: Increase your kick speed. Try to achieve a fluid motion in which your legs appear to be boneless. For 30 seconds, try to keep your head up while kicking.
Step 6: Once you’ve mastered a fluid, comfortable kick, test its effectiveness by pausing the sculling action with your hands. Cross your hands across your chest, with your left hand on your right shoulder and your right hand on your left. Keep your head above water by kicking. Keep going for 30 seconds.
Step 7: Once you can keep your head up without using your arms, try the advanced version of the drill: extend your arms side to side at the water’s surface. Raise your hands out of the water, bending at the elbow at a right angle. Kick! Can you stand up straight for 30 seconds?
DRILL FEEDBACK CHART
Problem: The issue is that I sink even when sculling.
Modification: Straighten your legs. Show off your toes. Kick more quickly
Problem: I have a problem in that I bounce up and down.
Modification: Instead of a scissor kick, use a narrower, faster-kicking motion.
Problem: I’m getting a kick in the calves.
Modification: Relax your feet more. Reduce your knee bend. Try to kick higher on your leg, where the muscles are bigger and stronger.
Floppy Foot Drill
THE PURPOSE OF THIS DRILL
- Creating a relaxed kick
- Observing fish-like propulsion
- Learning how to save energy
HOW TO DO THIS DRILL
Step 1: Watch a fish swim. Any fish will do, whether it’s your pet goldfish or a shark from the aquarium. Take note of the tail as the fish swims. It is not stiff but moves back and forth in the water like a flag in the breeze. It changes. The fish’s movement is not frantic; rather, it appears to be an effortless action.
Step 2: Put on a single, long swim fin on one foot and stand in the water with your back to the wall, submerging the entire fin. Swipe your leg up and down in the water, covering approximately 24 inches. Use enough speed to feel the fin’s resistance against the water. Keep an eye on how the water bends the fin as it moves. When you sweep your leg in one direction, the fin bends in the opposite direction. The movement is fluid, like the fish’s tail.
Step 3: Remove the fin and float face down in the water with extended arms. Begin kicking quickly, keeping your feet in the water and moving within about fifteen inches of the surface. Point your toes while relaxing your feet so that the water bends them like the fin. Kick fast for 30 seconds. Consider the effortless and fluid motion of a fishtail. Allow the water to move your foot like a flag in the wind. Rest, then repeat the process.
Step 4: Once you’ve mastered a fluid, floppy foot kick, you’ll notice that your kick’s splash is much more compact and productive. Swim several lengths of the pool.
DRILL FEEDBACK CHART
Problem: My feet are painfully stiff.
Modification: To begin, try to achieve the feeling on the land. Begin by moving your hand back and forth. Stand on one leg while relaxing the other ankle. Shake your other foot until it flops like your hand did. Sweep your leg forward, as if kicking a ball, with your foot relaxed. Keep an eye on your foot. Your relaxed foot should flop forward by the end of the movement. Put it in the water now.
Problem: My problem is that I don’t feel any resistance on my feet.
Modification: Kick more quickly. Alter the depth of your kick. It should be able to pass through about 15 inches of water. Allow your ankles to relax.
Problem: The issue is that I get tired too quickly to notice a sloppy kicking motion.
Modification: Give it some time. Remember that using the large muscles of your legs to initiate the kick will use more oxygen at first than a less effective kick, making you feel tired and out of breath. As you practice, your muscles adapt relatively quickly.
Pull / Push Freestyle
THE PURPOSE OF THIS DRILL
- Feeling the freestyle arm stroke’s path
- Developing a high elbow position
- Using the entire stroke length
HOW TO DO THIS DRILL
Step 1: Push off the wall, face down, arms extended, core engaged, and gaze at the pool’s bottom. Create a continuous flutter kick.
Step 2: With your right arm, perform a freestyle arm stroke. Begin by slightly pitching your fingertips and palm down, adjusting them to press back on the water rather than pressing down. Allow your forearm to follow, but maintain a high and firm elbow. Next, swipe your hand outward and down, then inward, until it aligns with your shoulder. Your elbow should be in line with your hand and shoulder at this point but sticking out as if you were trying to nudge someone. The “pull” portion of the freestyle arm stroke is shown here.
Step 3: Using your hand, quickly press back on the water. Feel your hand pass through your elbow. To keep pressure on the water, adjust the pitch of your hand. Swipe your hand back and forth until your arm is straight. Your hand should pass through your hip and end with your thumb on your thigh. The “push” portion of the freestyle arm stroke is shown here.
Step 4: Return your hand to the front reaching position over the water. Begin the arm stroke with your left arm when it passes your shoulder, pitching your fingertips and hands downward and allowing your forearm to follow. Push back on the water until your hand is parallel to your shoulder and your elbow points out to the side. Then, quickly press back past your elbow until your elbow is straight and past your hip. Take note of how your stroke changes from pull to push, deeper to shallower.
Step 5: Return your left arm to the front of the water, beginning the next stroke with your right arm when your left arm passes your shoulder out of the water. Stroking should be continued. Make use of the entire length of each arm stroke. Maintain a high elbow stance. Each stroke has a pull and a push. Practice swimming several pool lengths until you can clearly distinguish the freestyle stroke’s pull and push motions.
DRILL FEEDBACK CHART
Problem: I’m not feeling the pull.
Keep your elbow still while you begin the stroke with your hand. Pitch your palm and fingertips downward. Not down, but back on the water.
Problem: The issue is that I don’t feel the push.
Modification: Keep your elbow high and firm. Allow your hand to push through. You won’t be able to push effectively if your elbow drops back. Accelerate your movement toward your hip.
Problem: The issue is that I can’t do many strokes because I have to stop and breathe.
Modification: Take a deep breath and do four to six long strokes, then stand, breathe, and repeat.
Temple Press
THE PURPOSE OF THIS DRILL
- Learning the right head positioning while breathing
- Learning to breathe in a “low profile” manner
- Inhaling and experiencing the bow wave
HOW TO PERFORM THIS DRILL
Step 1: Step into waist-high water. Submerge your face in the water by bowing forward at the waist. Examine the pool’s bottom. Stretch your arms in front of you on the water’s surface. Bring one arm back to ward your hip underwater, and turn to that side as if breathing in freestyle. Freeze in that position. What portions of your head are in contact with water? What about your jawbone? Your chin? What about the temple?
Step 2: Rotate your head so your temples press down on the water. Doing so automatically connects your cheek and jew bone to the water. Your mouth might not clear the water as much as you are used to. That is fine.
Step 3: Noe begins swimming freestyle. Roll up and reach forward with your lower arm to breathe. Press your temple into the water as you prepare to inhale. Feel like your check and jew bone are also connected to the water. Notice that as you are moving forward during the breath, the water part around your head, Like it does at the bow of a moving boat. Even if your mouth is very close to the water, the “bow wave” created by pressing your temple into the water will create a pocket of air for you to inhale.
Step 4: Continue swimming, using the low profile breathing technique by pressing your temple into the water and breathing within the “bow wave.”
FEEDBACK DRILL CHART
Problem: When swimming freestyle, I can’t get my temple down.
Modification: Focus on improving your floating position. Begin by inspecting the pool’s bottom. Float “downhill” with your chest down.
Problem: The issue is that my information does not clear the air.
Modification: Roll the breathing side hip and shoulder up slightly more and the other side hip and shoulder down slightly more.
Problem: The issue is that I’m getting water in my mouth.
Modification: Increase forward motion with a more excellent kick. The stronger your forward motion, the larger the “bow wave,” causing the water to travel around you rather than into your mouth.
Dead Arm Freestyle
THE OBJECTIVE OF THIS DRILL
- Sense of inner engagement in breathing
- Breathing while reaching forward
- Observing the proper time of breathing
HOW TO PERFORM THIS DRILL
Step 1: Push against the wall as though you were going to swim freestyle. Bring one arm to your side and keep it still. Use your core tension.
Step 2: Swim freestyle with only the other arm. Focus on positioning your moving arm forward, squarely in front of your shoulder, before each stroke. Maintain a high elbow stance while you stroke, and use the entire length of each stroke to accelerate through. From front to rear, pull, then push.
Step 3: Using the unmoving arm, breathe to the side.
Turn to breathe using your hips and shoulders to commence your roll to breathe without moving your head independently. When the moving arm reaches for the front, start your inhalation just as your fingertips touch the water. Throughout the inhalation, continue to reach forward.
Step 4: As you inhale, you should be able to see your breathing side’s shoulder emerge from the water. Feel that shoulder and same side hip roll down as you return your face to the water.
Step 5: Swim with one arm to the pool’s edge, focusing on breathing with your body roll. Change arms. Repeat. Continue rolling with a solid core until you can achieve balanced breathing.
DRILL FEEDBACK CHART
Problem: I’m having difficulty breathing.
Modification: Using the stroking arm, roll the hip and shoulder down. If you’re flat, you won’t be able to take a breath.
Problem: To take a breath, I must lengthen my neck and raise my chin.
Modification: Create and maintain a “downhill” float. Increase the speed of your one-arm pull toward your hip. Kick some more.
Problem: The issue is that it feels weird.
Modification: This is an advanced drill! It will take some practice to get it right. More practice is required.
Subscribe to our newsletter
Stay up to date with our latest news.