
Being a licensed swimming instructor can be a fulfilling career decision since it combines a love of swimming with the joy of teaching. But how can I become a...
How to Teach a Child to Freestyle Swim
Most children learn freestyle swimming as their first stroke, although it is not always the easiest to teach.
The first swimming stroke that children should learn is freestyle, but it is not always the easiest to teach. Freestyle, sometimes known as the “front crawl,” resembles a “doggy paddle” at first as kids try to execute the stroke’s three components simultaneously: arms, legs, and breathing. I think it’s the best swimming stroke in terms of how quickly you can move in water with this swimming stroke. At first, it won’t seem that way.
Long-lasting freestyle strokes are built on a foundation of water comfort and fundamental swimming skills, such as floating and treading water, that should be learned early in the foundation building phase. Therefore, the child must be familiar with both, if not proficient in both.
However, if a child can kick their feet and is willing to let go of mom, dad, or the wall, they’re eager to give it a shot. Gliding across the water’s surface should be a simple next step if they’re a powerful floater.
However, how can one educate a child to swim freestyle? Here’s how to do it step by step.
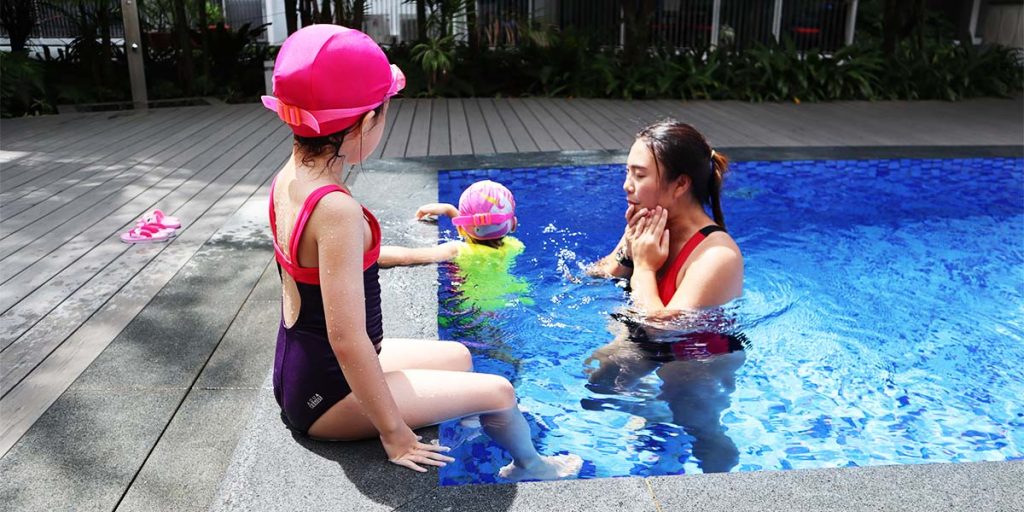
Kick the Legs in the First Step
When most parents first put their baby in the pool, they almost always try to get him or her to move their feet. There’s a reason for this: teaching kids to kick is a natural place to start. Your child should kick with straight legs and pointed toes for an efficient freestyle stroke.
Begin by putting your youngster on the top step in the pool. Show them how to point their toes like a ballerina while extending their legs into the water. Next, move their straight legs up and down in a scissor motion, holding slightly above their ankles. Allow them to practice on their own after they’ve seen how it’s done.
If the youngster can sit comfortably with their legs pretty straight, they’re ready to attempt on their stomach. Allow your child to enter the water and lie face down on the steps, arms extended and legs stretched behind them. Make sure your legs are straight, your toes are pointed, and then move them up and down in the water while holding just above your ankles.
Allow them to attempt on their own now. NOTE: If there are no steps in the pool, the youngster should grab a ledge or your hands.
It’s time to practice forward motion once the toddler has mastered kicking on the steps. Hold your child’s hands just beneath the water’s surface and have them kick their legs up and down while lying on their stomach.
Emphasize the need to keep their legs under the water’s surface while stepping backward as they go forward. The backs of their toes may spring out, causing some white water, but it’s not a significant concern.
Furthermore, most children will bend their arms and bring themselves closer to you. That’s fine as well. It’s a good idea to help your swimmer become more confident by encouraging them to stretch their arms out like Superman or Superwoman. Next, they practice kicking while walking around the pool at various speeds.
The final kicking activity is to have the youngster kick while looking at the bottom of the pool and blowing bubbles. Then, have them practice their bubble pattern by pulling their head up for a breath and returning their gaze to the bottom while blowing additional bubbles, just like they did when learning to float.
Step 2: Get Those Arms Moving
When it comes to the freestyle arm action, you want their fingers to be closed, not spread out as if tracing their hand, and their arms should drag water back towards their hips.
Begin wherever the youngster can stand in the pool. Swing their arms in large circles as they stroll around the pool. They’re just getting a feel for pulling water and pushing their arm underwater before bringing it back into the air at this point.
Allow the youngster to lie down on their stomach in the water with their arms outstretched and hands-on a step once their shoulders have warmed up (similar to learning the front float.) Instruct boys to reach for their shorts and girls to pull past their bikini bottoms while they drag one arm underwater to their hip. Then raise their straightened arm out of the water and replace it on the same step where it began. One arm at a time, move one arm, then the other.
The next phase, similar to learning to kick, is to hold the child’s hands out in front of them while their body floats at the water’s surface. Allow them to try circling their arm underwater to their hip and then back into the air into your hand by letting go of one hand at a time.
Encourage the youngster to multitask by kicking while moving their arms as they become more comfortable with the movements.
Then, while your child moves their arms in circles and kicks their legs up and down, grip their waist and walk beside them. Instead of taking turns as they did when you were holding their hands, both arms should be moving continuously.
It’s time for some solo swimming if they can keep their body at the surface and move both arms and legs in synchrony. Back away from your youngster and instruct them to dive to the bottom and swim towards you. They can also launch themselves off a stair or press themselves against a wall to gain momentum.
Continue to practice and encourage the youngster to take increasingly more strokes before stopping. The most important reason for them to put their feet down or be taken up is to breathe.
Step 3: Take a deep breath now.
Breathing is the most difficult component of any stroke, and most youngsters will stop and stand up if they need breath before this moment. As a result, most children will find it difficult to lift their heads to breathe at first. To assist them, begin by tilting their torso upward.
While swimming, keep a tight grip on your child’s waist. Say “breathe” every 3 to 5 strokes and tilt your child’s head out of the water. Allow them to catch their breath before saying “swim” and re-entering the water.
Return some independence to the youngster once he or she has learned to lift their head. As you say “breathe,” have them swim towards you, but put a hand under their stomach for support every few strokes.
Hold your child at the surface while they take a breath, then release when they return their face to the surface.
To keep their head above water, remind your youngster to keep kicking (or kick even harder) while breathing. If breathing takes a long time, they may need to do some smaller “dog paddle” strokes to keep their body near the surface while they breathe.
Turn them loose when they can catch their breath with minimal assistance. Just be aware that some children will lift their heads from the water but neglect to inhale. Continue to remind yourself to “breathe” and “keep swimming” after each breath.
There have been many times when they’ve shown how to swim, breathe, and swim again. They’re ready to learn how to breathe on the side.
Instruct the students to put their face in the water and look down at the bottom of a pool from a place where they can stand in it. They should next move their head to the side so that one eye is buried and their mouth is above water. Encourage them to try blowing bubbles while gazing down and taking a breath while leaning to the side.
They should try to breathe while swimming at this point. As they breathe, have them place their ear on the outstretched arm as a pointer. They should breathe to the left if their right arm is outstretched. (Their right eye and ear will remain slightly immersed in the water.)
They can kick while floating on their side with their face on their arm if they need more air. Then they return their gaze to the pool’s bottom while their arms continue to pull.
Step 4: Work on your patience.
Freestyle is not a stroke that can be learned in a single day. It isn’t even possible to learn it in a single summer stroke.
It takes a lot of practice to get good at it. Some children will have difficulty keeping their legs straight. Some people may not be able to control their breathing. Others refuse to raise their arms above the water. Don’t be concerned about their blunders, and don’t put too much pressure on them.
Allow them to use it if they’ve developed a strong, confident doggy paddle; you can work in some freestyle practice here and there. It’s more vital that they enjoy themselves by having the means to cruise around the pool and play in the water
Tydus is the Assistant Head Swim Coach at Friendly Dolphin Swim School. He coached swim team for children aged 4 to 18 for five years and has given over 900 private swimming lessons to children and adults of all ages.
Subscribe to our newsletter
Stay up to date with our latest news.